電驢下載基地 >> 其他资源 >> 電腦基礎 >> 《Photoshop CS5 一對一教程:精通篇》(Lynda.com Photoshop CS5 One-on-One:Mastery)[光盤鏡像]
| 《Photoshop CS5 一對一教程:精通篇》(Lynda.com Photoshop CS5 One-on-One:Mastery)[光盤鏡像] | |
|---|---|
| 下載分級 | 其他资源 |
| 資源類別 | 電腦基礎 |
| 發布時間 | 2017/7/13 |
| 大 小 | - |
《Photoshop CS5 一對一教程:精通篇》(Lynda.com Photoshop CS5 One-on-One:Mastery)[光盤鏡像] 簡介: 中文名 : Photoshop CS5 一對一教程:精通篇 英文名 : Lynda.com Photoshop CS5 One-on-One:Mastery 資源格式 : 光盤鏡像 主講人 : Deke McClelland 發行日期 : 2010年09月30日 地區 : 美國 對白語言 : 英語 文字語言 : 英文 簡介 : 資源簡介 Lynda.com最新出品的P
電驢資源下載/磁力鏈接資源下載:
- 下載位址: [www.ed2k.online][Photoshop.CS5.一對一教程:精通篇].Lynda.com.Photoshop.CS5.One.on.One.Mastery-JGTiSO.iso
- 下載位址: [www.ed2k.online][Photoshop.CS5.一對一教程:精通篇].Lynda.com.Photoshop.CS5.One.on.One.Mastery-JGTiSO.nfo
全選
"《Photoshop CS5 一對一教程:精通篇》(Lynda.com Photoshop CS5 One-on-One:Mastery)[光盤鏡像]"介紹
中文名: Photoshop CS5 一對一教程:精通篇
英文名: Lynda.com Photoshop CS5 One-on-One:Mastery
資源格式: 光盤鏡像
主講人: Deke McClelland
發行日期: 2010年09月30日
地區: 美國
對白語言: 英語
文字語言: 英文
簡介:
資源簡介
Lynda.com最新出品的Photoshop CS5 One-on-One:Mastery視頻教程. Photoshop CS5 一對一大師級篇視頻教程.
主講人:Deke McClelland
教學時長:長達20個小時海量教學. 並提供有配套素材文件以供練習提高.
官網鏈接:
http://www.lynda.com/home/DisplayCourse.aspx?lpk2=61019
內容簡介
Photoshop CS5 One-on-One: 精通篇是非常受歡迎的該系列教程的第3部分.同時也是該系列教程最後一部分教學視頻. 加入到Photoshop行業專家和獲獎者Deke McClelland的教學中來. 探索傳統工具的巨大能力.比如:masking 和 blend modes、delve into Smart Objects、Photomerge等等
In the all-new Photoshop CS5 One-on-One: Mastery, the third and final installment of the popular series, join industry expert and award-winning author Deke McClelland for an in-depth tour of the most powerful and empowering features of Photoshop CS5. Discover the vast possibilities of traditional tools, such as masking and blend modes, and then delve into Smart Objects, Photomerge, as well as the new Puppet Warp, Mixer Brush, and HDR features. Exercise files accompany the course.
學習該視頻教學前提條件: 已經學習完Photoshop CS5 一對一教學:基礎篇和高級篇.
Recommended prerequisites: Photoshop CS5 One-on-One: Fundamentals and Photoshop CS5 One-on-One: Advanced.
視頻內容主要有:
Using masks and blend modes in radically new ways
Mastering the Pen tool and Paths panel
Transforming and maximizing Smart Objects
Employing Smart Filters to create complex effects
Exploring the capabilities of Bristle brushes and the Mixer Brush
Merging multiple images into seamless panoramas
Exploring the full range of luminance with HDR Pro
Recording actions and batching-processing images
教程截圖預覽:
目錄:
Introduction
Welcome 02:45
Making Photoshop your default image editor 07:43
Installing the dekeKeys keyboard shortcuts 08:10
Remapping OS shortcuts 07:37
Installing the Best Workflow color settings 04:31
The color settings explained 06:54
Loading the CS5 color settings in Bridge 03:05
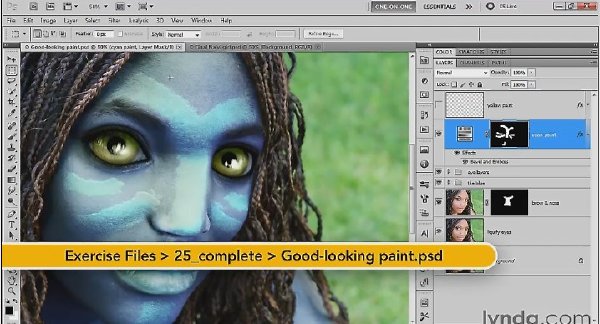
01:11:34 25. What Photoshop Can Do, Pt. 3: The Face Paint
Your creative range continues to expand 01:46
The Avatar project so far 02:38
Painting on a photograph 07:50
Adding texture and depth 06:14
Simulating chalky white paint 07:23
Masking and placing an image 07:20
Upsampling and Lens Blur 05:09
Blending blurry elements 03:48
Making a Smart Object 06:46
Placing an image as a Smart Object 03:22
Blending away a background 05:56
Applying Smart Filters 04:34
Creating a glow with Lens Flare 03:45
Blending and masking a glow 05:03
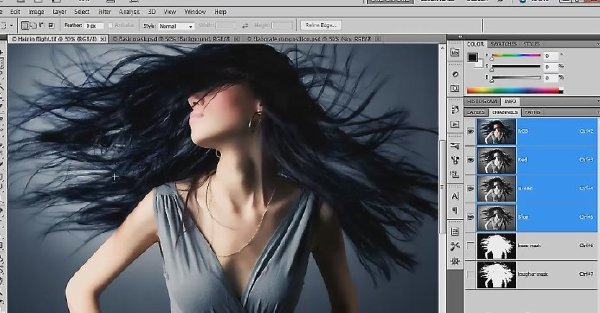
01:26:55 26. Masking Essentials
Using the image to select itself 01:53
Introducing masking 06:32
Making an alpha channel 06:54
Using the Calculations command 06:48
Add, Subtract, Offset, and Scale 05:54
Prepping an image with the Dodge tool 06:55
Fixing mistakes before they get too big 06:32
Painting in the Overlay mode 05:51
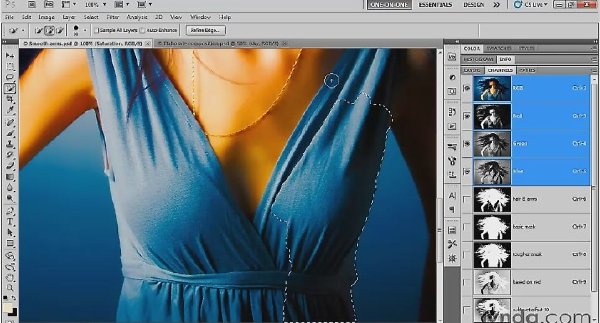
Exaggerating and selecting flesh tones 07:39
Smudge, Median, and the Blur tool 06:59
Masking low-contrast details 06:07
Creating a flesh-and-clothing mask 05:45
Masking and compositing the foreground 05:27
Finessing the final composition 07:39
02:24:34 27. Everything About the Pen Tool
Connecting the dots 01:40
The Pen tool and the Paths panel 06:32
Drawing a straight-sided outline 06:31
Editing a path outline 06:36
Adding and editing smooth points 05:35
Creating vector masks with the shape tools 04:59
Building a complex outline from shapes 04:26
Subtracting and transforming shapes 06:45
Cloning, flipping, and combining shapes 08:58
Roughing in non-symmetrical paths 07:41
Finessing a complex outline 09:15
Masking a layer effect 08:26
Isolating an image element 06:08
Smooth points and control handles 09:03
Stretching curved segments 07:49
Using the Rubber Band option 09:33
Drawing smooth points with the Pen tool 06:59
Shading an isolated object 03:45
Drawing cusp points 07:14
Setting points in the pasteboard 09:57
Using the Convert Point tool 06:42
02:57:17 28. Blend Modes Revealed
Everything you need to know about blending 01:45
Photoshop CS5's blend modes 07:21
Cycling between blend modes 06:15
Darken and Lighten and their derivatives 06:03
The blend mode shortcuts 08:06
The Multiply and Burn modes 04:28
The Screen and Dodge modes 06:00
How opposite blend modes work 08:24
Why Multiply darkens and Divide lightens 05:23
Cleaning up a client's bad art 05:03
Dropping out a white background 05:56
Blending inside blend modes 08:03
Overlay, Soft Light, and Hard Light 06:26
Vivid, Linear, and Pin Light (and Hard Mix) 06:35
Difference, Exclusion, Subtract, and Divide 07:34
Great uses for the Difference mode 06:18
Promising uses for the Divide mode 09:06
Hue, Saturation, Color, and Luminosity 07:00
Blending an inverted layer 03:32
The "Fill Opacity Eight" 07:25
Making bad blend modes good 05:16
Making a knockout layer 06:53
Blending in the CMYK mode 08:03
Overprinting black text 08:29
Using the Luminance slider 05:24
Parametric luminance masking 06:21
Adjusting the behavior of luminance effects 10:08
02:02:11 29. The Power of Smart Objects
Smart Objects = protective containers 01:35
Placing an Illustrator graphic 06:30
Vector copy and paste options 06:56
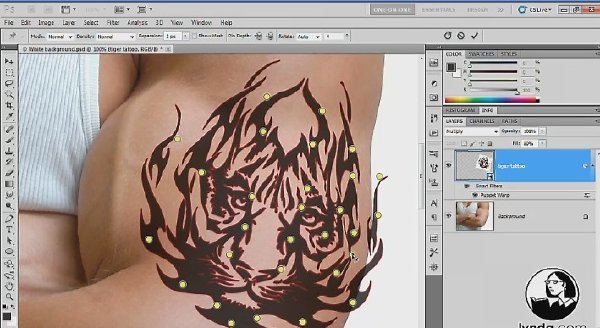
Applying Puppet Warp to vectors 08:09
"Gluing" vector art for Puppet Warp 05:50
Warping art onto the surface of an image 08:07
Blending a Smart Object 04:30
Blurring and blending a Smart Object 06:08
Making changes in Illustrator 05:57
Creating "true clones" 07:18
Double-flipping text 04:44
Applying effects to multiple layers 03:24
Updating true clones in one operation 07:36
Editing JPEGs as Camera Raw objects 05:49
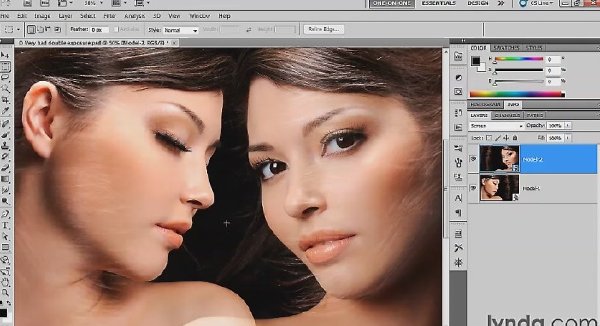
Creating a double-exposure effect 07:15
Masking and shading transitions 07:47
Applying and repeating Camera Raw edits 06:09
Copying vs. cloning a Smart Object 05:18
Flipping a Smart Object and its mask 03:42
Adjusting multiple Camera Raw clones 03:53
Text that inverts everything behind it 05:34
01:59:47 30. Nondestructive Smart Filters
This time, "smart" means dynamic 01:37
Introducing Smart Filters 06:28
Traditional High Pass sharpening 05:17
Smart High Pass in the Lab mode 07:57
Sharpening a high-frequency image 07:46
Retroactively reducing noise 07:31
Which filters are Smart Filters? 06:20
Shadows/Highlights as a Smart Filter 04:37
Nesting one Smart Object inside another 07:11
Drawing a mask from a nested Smart Object 08:07
Better Shadows/Highlights inside Lab 09:16
Tempering saturation values in Lab 07:00
Filtering live, editable text 09:02
Enhancing filters with layer effects 04:33
Applying a filter multiple times 05:00
Creating a synthetic star field 07:07
Making a stucco or drywall pattern 06:28
Land, sea, and clouds 08:30
02:50:29 31. The Bristle and Mixer Brushes
Photoshop's advanced painting tools 02:03
Canvas texture and brush libraries 06:40
Painting with a predefined custom brush 09:21
Dissecting a custom brush 11:09
Designing and using a custom brush 04:54
Saving and loading brush presets 05:27
The ten styles of bristle brushes 09:47
Size, Spacing, and Angle 07:02
Using the Bristle Brush preview 07:53
Bristles, Length, Thickness, and Stiffness 06:53
Stylus tilt and mouse behavior 05:25
Stroking a path outline with a brush 04:00
Troubleshooting a stylus 05:49
Introducing the Mixer Brush 07:22
The Load, Mix, and Wet values 05:01
Cleaning and loading a brush 06:26
Shading a piece of graphic art 06:34
Shading with color 07:53
Mixing a photographic portrait 06:11
Tracing the fine details in an image 05:52
Crosshatching and brush size 05:53
Covering up and augmenting details 07:36
Painting in hair and fabric 05:54
Painting and scaling very fine hairs 08:07
Adding texture with the Emboss filter 08:31
Exploiting a "happy accident" 02:46
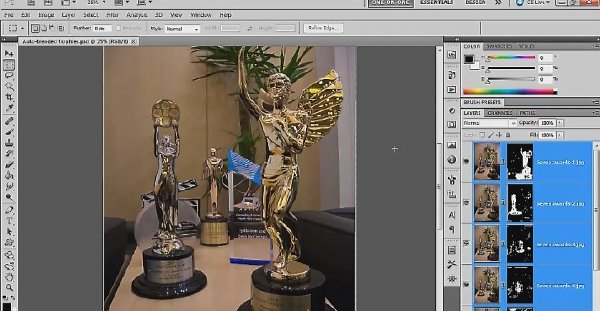
01:40:55 32. Auto-Align, Auto-Blend, and Photomerge
Artificial intelligence that works 01:22
The Auto-Align Layers command 07:25
The Auto-Blend Layers command 03:54
Masking auto-aligned layers 04:50
The Geometric Distortion setting 06:44
The Seamless Tones and Colors checkbox 04:08
Creating the best possible layer mask 09:18
Auto-blending depths of field 05:54
Finessing masks, accepting imperfections 06:29
Shooting and downsampling panorama images 05:54
Introducing the Photomerge command 06:40
Evaluating the Layout settings 06:47
Loading, aligning, and blending with Photomerge 05:36
Tracing and extracting seams 07:18
Adding a masked element into a panorama 05:55
Simplifying and correcting a panorama 05:58
Smart Filters and nondestructive cropping 06:43
01:18:43 33. High Dynamic Range (HDR Pro)
The most mysterious of mysterious topics 02:29
Introducing HDR Toning 06:43
Reigning in clipped highlights 05:54
The Local Adaptation options 09:05
Nondestructive editing with HDR Toning 08:22
Using the HDR Toning Curve 07:02
HDR Toning vs. Shadows/Highlights 06:00
Merging multiple exposures 07:14
A first look at HDR Pro 06:24
Removing ghosts, correcting backlighting 07:11
Generating and editing an HDR comp 07:00
HDR rendered to completion 05:19
01:27:07 34. Actions and Batch Processing
Processing hundreds of files in no time 01:43
Creating an action set 06:37
Making an action 07:07
Stop, Delete, and Record 07:12
Add, Undo, and Rerecord 06:40
Playing and testing an action 06:31
Playing and editing a specific operation 06:39
Permitting the user to change settings 04:58
Explaining an action with a custom stop 05:00
Batch-processing multiple images 07:22
Adding a Save As operation 06:34
Creating an action to save web graphics 07:59
Batching two actions into one 07:15
Saving and loading actions 05:30
01:19 Conclusion
See ya 01:19
代碼
英文名: Lynda.com Photoshop CS5 One-on-One:Mastery
資源格式: 光盤鏡像
主講人: Deke McClelland
發行日期: 2010年09月30日
地區: 美國
對白語言: 英語
文字語言: 英文
簡介:
資源簡介
Lynda.com最新出品的Photoshop CS5 One-on-One:Mastery視頻教程. Photoshop CS5 一對一大師級篇視頻教程.
主講人:Deke McClelland
教學時長:長達20個小時海量教學. 並提供有配套素材文件以供練習提高.
官網鏈接:
http://www.lynda.com/home/DisplayCourse.aspx?lpk2=61019
至此Lynda.com推出的精品 Photoshop CS5 One-on-One系列教程現已全部更新.
Lynda.com Photoshop CS5 One-on-One: Fundamentals基礎篇
http://www.ed2000.com/ShowFile.asp?vid=2822265 by "langard"
Lynda.com Photoshop CS5 One-on-One: Advanced 高級篇
http://www.ed2000.com/ShowFile.asp?vid=2843925 by "xiaochenjia@我要掛科了"
Lynda.com Photoshop CS5 One-on-One:Mastery 精通篇/大師篇
http://www.ed2000.com/ShowFile.asp?vid=2855411 by "xiaochenjia@我要掛科了'
該資源Lynda.com Photoshop CS5 One-on-One:Mastery 教學光盤包括視頻教程+配套素材練習文件.
內容簡介
Photoshop CS5 One-on-One: 精通篇是非常受歡迎的該系列教程的第3部分.同時也是該系列教程最後一部分教學視頻. 加入到Photoshop行業專家和獲獎者Deke McClelland的教學中來. 探索傳統工具的巨大能力.比如:masking 和 blend modes、delve into Smart Objects、Photomerge等等
In the all-new Photoshop CS5 One-on-One: Mastery, the third and final installment of the popular series, join industry expert and award-winning author Deke McClelland for an in-depth tour of the most powerful and empowering features of Photoshop CS5. Discover the vast possibilities of traditional tools, such as masking and blend modes, and then delve into Smart Objects, Photomerge, as well as the new Puppet Warp, Mixer Brush, and HDR features. Exercise files accompany the course.
學習該視頻教學前提條件: 已經學習完Photoshop CS5 一對一教學:基礎篇和高級篇.
Recommended prerequisites: Photoshop CS5 One-on-One: Fundamentals and Photoshop CS5 One-on-One: Advanced.
視頻內容主要有:
Using masks and blend modes in radically new ways
Mastering the Pen tool and Paths panel
Transforming and maximizing Smart Objects
Employing Smart Filters to create complex effects
Exploring the capabilities of Bristle brushes and the Mixer Brush
Merging multiple images into seamless panoramas
Exploring the full range of luminance with HDR Pro
Recording actions and batching-processing images
教程截圖預覽:
目錄:
Introduction
Welcome 02:45
Making Photoshop your default image editor 07:43
Installing the dekeKeys keyboard shortcuts 08:10
Remapping OS shortcuts 07:37
Installing the Best Workflow color settings 04:31
The color settings explained 06:54
Loading the CS5 color settings in Bridge 03:05
01:11:34 25. What Photoshop Can Do, Pt. 3: The Face Paint
Your creative range continues to expand 01:46
The Avatar project so far 02:38
Painting on a photograph 07:50
Adding texture and depth 06:14
Simulating chalky white paint 07:23
Masking and placing an image 07:20
Upsampling and Lens Blur 05:09
Blending blurry elements 03:48
Making a Smart Object 06:46
Placing an image as a Smart Object 03:22
Blending away a background 05:56
Applying Smart Filters 04:34
Creating a glow with Lens Flare 03:45
Blending and masking a glow 05:03
01:26:55 26. Masking Essentials
Using the image to select itself 01:53
Introducing masking 06:32
Making an alpha channel 06:54
Using the Calculations command 06:48
Add, Subtract, Offset, and Scale 05:54
Prepping an image with the Dodge tool 06:55
Fixing mistakes before they get too big 06:32
Painting in the Overlay mode 05:51
Exaggerating and selecting flesh tones 07:39
Smudge, Median, and the Blur tool 06:59
Masking low-contrast details 06:07
Creating a flesh-and-clothing mask 05:45
Masking and compositing the foreground 05:27
Finessing the final composition 07:39
02:24:34 27. Everything About the Pen Tool
Connecting the dots 01:40
The Pen tool and the Paths panel 06:32
Drawing a straight-sided outline 06:31
Editing a path outline 06:36
Adding and editing smooth points 05:35
Creating vector masks with the shape tools 04:59
Building a complex outline from shapes 04:26
Subtracting and transforming shapes 06:45
Cloning, flipping, and combining shapes 08:58
Roughing in non-symmetrical paths 07:41
Finessing a complex outline 09:15
Masking a layer effect 08:26
Isolating an image element 06:08
Smooth points and control handles 09:03
Stretching curved segments 07:49
Using the Rubber Band option 09:33
Drawing smooth points with the Pen tool 06:59
Shading an isolated object 03:45
Drawing cusp points 07:14
Setting points in the pasteboard 09:57
Using the Convert Point tool 06:42
02:57:17 28. Blend Modes Revealed
Everything you need to know about blending 01:45
Photoshop CS5's blend modes 07:21
Cycling between blend modes 06:15
Darken and Lighten and their derivatives 06:03
The blend mode shortcuts 08:06
The Multiply and Burn modes 04:28
The Screen and Dodge modes 06:00
How opposite blend modes work 08:24
Why Multiply darkens and Divide lightens 05:23
Cleaning up a client's bad art 05:03
Dropping out a white background 05:56
Blending inside blend modes 08:03
Overlay, Soft Light, and Hard Light 06:26
Vivid, Linear, and Pin Light (and Hard Mix) 06:35
Difference, Exclusion, Subtract, and Divide 07:34
Great uses for the Difference mode 06:18
Promising uses for the Divide mode 09:06
Hue, Saturation, Color, and Luminosity 07:00
Blending an inverted layer 03:32
The "Fill Opacity Eight" 07:25
Making bad blend modes good 05:16
Making a knockout layer 06:53
Blending in the CMYK mode 08:03
Overprinting black text 08:29
Using the Luminance slider 05:24
Parametric luminance masking 06:21
Adjusting the behavior of luminance effects 10:08
02:02:11 29. The Power of Smart Objects
Smart Objects = protective containers 01:35
Placing an Illustrator graphic 06:30
Vector copy and paste options 06:56
Applying Puppet Warp to vectors 08:09
"Gluing" vector art for Puppet Warp 05:50
Warping art onto the surface of an image 08:07
Blending a Smart Object 04:30
Blurring and blending a Smart Object 06:08
Making changes in Illustrator 05:57
Creating "true clones" 07:18
Double-flipping text 04:44
Applying effects to multiple layers 03:24
Updating true clones in one operation 07:36
Editing JPEGs as Camera Raw objects 05:49
Creating a double-exposure effect 07:15
Masking and shading transitions 07:47
Applying and repeating Camera Raw edits 06:09
Copying vs. cloning a Smart Object 05:18
Flipping a Smart Object and its mask 03:42
Adjusting multiple Camera Raw clones 03:53
Text that inverts everything behind it 05:34
01:59:47 30. Nondestructive Smart Filters
This time, "smart" means dynamic 01:37
Introducing Smart Filters 06:28
Traditional High Pass sharpening 05:17
Smart High Pass in the Lab mode 07:57
Sharpening a high-frequency image 07:46
Retroactively reducing noise 07:31
Which filters are Smart Filters? 06:20
Shadows/Highlights as a Smart Filter 04:37
Nesting one Smart Object inside another 07:11
Drawing a mask from a nested Smart Object 08:07
Better Shadows/Highlights inside Lab 09:16
Tempering saturation values in Lab 07:00
Filtering live, editable text 09:02
Enhancing filters with layer effects 04:33
Applying a filter multiple times 05:00
Creating a synthetic star field 07:07
Making a stucco or drywall pattern 06:28
Land, sea, and clouds 08:30
02:50:29 31. The Bristle and Mixer Brushes
Photoshop's advanced painting tools 02:03
Canvas texture and brush libraries 06:40
Painting with a predefined custom brush 09:21
Dissecting a custom brush 11:09
Designing and using a custom brush 04:54
Saving and loading brush presets 05:27
The ten styles of bristle brushes 09:47
Size, Spacing, and Angle 07:02
Using the Bristle Brush preview 07:53
Bristles, Length, Thickness, and Stiffness 06:53
Stylus tilt and mouse behavior 05:25
Stroking a path outline with a brush 04:00
Troubleshooting a stylus 05:49
Introducing the Mixer Brush 07:22
The Load, Mix, and Wet values 05:01
Cleaning and loading a brush 06:26
Shading a piece of graphic art 06:34
Shading with color 07:53
Mixing a photographic portrait 06:11
Tracing the fine details in an image 05:52
Crosshatching and brush size 05:53
Covering up and augmenting details 07:36
Painting in hair and fabric 05:54
Painting and scaling very fine hairs 08:07
Adding texture with the Emboss filter 08:31
Exploiting a "happy accident" 02:46
01:40:55 32. Auto-Align, Auto-Blend, and Photomerge
Artificial intelligence that works 01:22
The Auto-Align Layers command 07:25
The Auto-Blend Layers command 03:54
Masking auto-aligned layers 04:50
The Geometric Distortion setting 06:44
The Seamless Tones and Colors checkbox 04:08
Creating the best possible layer mask 09:18
Auto-blending depths of field 05:54
Finessing masks, accepting imperfections 06:29
Shooting and downsampling panorama images 05:54
Introducing the Photomerge command 06:40
Evaluating the Layout settings 06:47
Loading, aligning, and blending with Photomerge 05:36
Tracing and extracting seams 07:18
Adding a masked element into a panorama 05:55
Simplifying and correcting a panorama 05:58
Smart Filters and nondestructive cropping 06:43
01:18:43 33. High Dynamic Range (HDR Pro)
The most mysterious of mysterious topics 02:29
Introducing HDR Toning 06:43
Reigning in clipped highlights 05:54
The Local Adaptation options 09:05
Nondestructive editing with HDR Toning 08:22
Using the HDR Toning Curve 07:02
HDR Toning vs. Shadows/Highlights 06:00
Merging multiple exposures 07:14
A first look at HDR Pro 06:24
Removing ghosts, correcting backlighting 07:11
Generating and editing an HDR comp 07:00
HDR rendered to completion 05:19
01:27:07 34. Actions and Batch Processing
Processing hundreds of files in no time 01:43
Creating an action set 06:37
Making an action 07:07
Stop, Delete, and Record 07:12
Add, Undo, and Rerecord 06:40
Playing and testing an action 06:31
Playing and editing a specific operation 06:39
Permitting the user to change settings 04:58
Explaining an action with a custom stop 05:00
Batch-processing multiple images 07:22
Adding a Save As operation 06:34
Creating an action to save web graphics 07:59
Batching two actions into one 07:15
Saving and loading actions 05:30
01:19 Conclusion
See ya 01:19
代碼
ÜÜÜ
ÜÜÜÜÜÜÜßßßßßßß Û²Ü
ÜÜÜÜÜÜÜßßßßßßß ÛÛÛ²
Û Û² ÛÛÛÛ
Û Û ²ÛÛÛ°
Û Û Ü °ÛÛÛ²
ÜÜÜÛßßßßßßßßßßßßÛÜÜÜÜ ² Û° ß ÜÜÜÜÜÜÜÜÛÛ²ßß ÛÛÛÛ
ܱ²ßÜÜÜÛÛÛÛÛÛÛÛÛÛÛÛÜÜ߲ܲ²²ÜÜ ° Û² ßÛÛÛ ßÛÛ ÛÛ ÛÛÛÛ
°±²ÛÛßßßÛÛßÛÛÛßÛÛßÛßÛÛ²Û²²²±±° Û Û ÛÛ² ÛÛ ß²Û ÛÛ ²ÛÛÛ°
°±²ÛÛ ßÜÛ Û Û Û Û ßÜÛÛ²Û²²²±±° Û Û ÛÛÛ ßÛÛ Üß ßß²Ü °ÛÛÛ²
°±²ÛÛ ß ÛÜßÜÛÜßÜÛ Û ÛÛ²Û²²²±±° Û Û° Üßß ßß ß ÛÛÛÛ
°±²ÛÛÛÛÛÛÛÛÛÛÛÛÛÛÛÛÛÛÛ²Û²²²±±° ° Û ² JUDGEMENT ÛÛÛÛ
°±²ÛÛ ÛßÛ ÛßÜßÛ ÜßÛ Û²Û²²²±±° ° Û Û ²ÛÛÛ°
°±²ÛÛÜßÜßÜÛ Ü Û ÜßÛ ßÛ²Û²²²±±° ° Û Û °ÛÛ ²
°±²ÛÛßßßßßßßßßßßßßßßÛÛ²Û²²²±±° ° ² Û° Û ÛÛ
°±²ÛÛßßßÛßßßßßßÛßÛßßÛÛ²Û²²²±±° ° °Û ² ÛÛ Û
Üß°±²ÛÛßßßßßßÛßßßßßÛßßÛÛ²Û²²²±±° °Ü Û Û ² ÛÛ°
± ²°±²ÛÛßßßÛßßßßßßßßßßßÛÛ²Û²²²±±° °± Û Û °Û Û²
± °±²ÛÛßßßßßßÛßßßßßßÛßÛÛ²Û²²²±±° °± ² Û° Loyalty. Pride. Tradition ÛÛ Û
±°±²ÛÛÛÛßÛßÛÛÛÛÛÛÛÛÛÛÛÛ²Û²²²±±° °± °Û ² Since 1998 A.D. °Û ÛÛ
°±²ÛÛÛßßßßßßßßßßßßßßÛÛ²Û²²²±±° °±² Û Û ÜÜÜܲÛÛ Û
°ßßÜÜÜßßßßßßßßßßßßßßÜÜÜÜßßß±±°°Û²²ßßÜÛ ÜÜÜÜÜÜÜÜßÛßÛßÛßßßÛßÜßÜßÜßÛÛ
ÜßßÜÜܲ²²²²²²²²²²²²²ÜÜÜÜßßßÜÜß°ßÜÜ ßÜßÛßÛßÛßÜßÜßÜßÜßÜÛÜÛÜÛÜßßßßßßßßß ß
²²ßßßÜÜÜÜÜ ÜÜßßßß ßßßß²²²ÜÜß²ßÜÜÛÜ ßÜÛÜÛÜÛßßßßßßßß
°°° ± ÛßßÜÜßß °°°°°°°° ßß²²Ûßß °° ° °°°°°°°°°°°°°°°°°°°°°°°°°
±±±± ±ÜÛß Ü±±±±±±±±ß ÜÜÜ ß±±± ÜÜܲ±±±±±±±±±±±±±±±±±±±±±±±±±±±±±±±±±±±
²²²²²ÜÜÜܲ²²²²²²²²Û ÛÛ²²² ²²²ß ܲÜÜÜÜÜ ÜÜÜÜÜ ²²²²²²²²²²²²²²²²²²²²²
ßßßßßßßßßßßßßßßßßßÛ ßßß ÛßßܲÛÛÛÛÛÛÛÛÛÛ²ßÛÛÛ²² Ûßßßßßßßßßßßßßßßßßßßß
ßÛÛÛßßßßßßßßßßßßß ÛÛÛ²²ß ܲ ßßßÛßß ßÛÛÛÛÛ ßßßßßßßßßßßßßßßÛÛÛß
²ß ÛÛÛÛß ÛÛÛ° Ü²Û Ü ÛÛÛÛÛÛÛ²±° ß²
ß ÜÜÜÜÜ ÛÛÛÛ ÛÛÛ²² ÛÛÛÛÝß²ßÛÛÛÛ² ÜÜÜÜÜ ß
²ÛÛÛÛ ÛÛÛÛ ²ÛÛÛÛ° Ü²Ü ÛÛÛÛÜ ÛÛÛÛÛ ÛÛÛÛ²
ÛÛÛ²² ÛÛÛÛÜ ²ÛÛÛ² ß ÜÛ²²ÛÛÛÜ ß²ÛÛ ²²ÛÛÛ
ÜÛÛÛÛß ÛÛÛÛÛ ÛÛÛÛÛ ÜÛß ßÛÛÛ²² ßÛÛ ßÛÛÛÛÜ
²ÛÛÛÛ ßÜÛÛÛÛÛ ÛÛÛ²²ß ßÛÛÛÛÛ ÛÛÜ ÛÛÛÛ²
ßÛÛÛÛ Ü²Ü ÞÛÛÛÛÛ ßßß Ü ÛÛÛÛß ÛÛÝ Ü²Ü ÛÛÛÛß
Ü ßß²ÛÜß ÛÛÛÛ² ÜÜ ß²ß ²²Ûß Ü²Ûß ßÜÛ²ßß Ü
ÜÜ²ß ßß²ÛÛÛÛ²ß ßßÛ²ÜÜÜÛÛß ²²ÛÛÛÛÛ²ßß ßÛÜÜ
²ÛÛÛ ßßÜÜ °°ßßß ßß ÜÜßß ÛÛ²²
ß²ÛÛÜÜÜ ß ° ±± ° ß ÜÜÜÛÛ²ß
ßÜÜ ßßß²ÛÛÛÛÛÛÜÜÜÜÜÜÜÜ ßܱ ²² ±Üß ÜÜÜÜÜÜÜÜÛÛÛÛÛÛ²ßßß
²²Ü Ü ßßßßßßß²²ÛÛÛÛÛÛÛ²ÛÛÛÛÛ² ÛÛ ²ÛÛÛÛÛ²ÛÛÛÛÛÛÛ²²ßßßßßßß
ÛÛ² Ü²Ü ß
ÛÛÛ ß * Title..: Lynda.com Photoshop CS5 One-on-One Mastery
ÛÛÛ * Date...: October 2nd, 2010
Ü ÛÛÛ * Type...: Bookware
ß²ÛÛÛ²² Û * Disks..: 101x50mb
ÜÜܲ Ü Ü
ÜÜÜ Ü ß²²ÛÛÛÛÛÛÛÛÛÛÛÛÛÛÛÛÛÛÛÛÛÛÛÛÛÛÛÛÛÛÛÛÛÛÛÛÛÛÛÛÛÛÛÛÛ²ß
²²² Ü ßÜ ßß²Ü
ßßßß Û ²² Ü ß
°±²ÛÛÛÛÛÛß Üß ß²ß Release notes:
ÜÜÜ
ÜÜÜ In the all-new Photoshop CS5 One-on-One: Mastery, the
ÛÛÛ third and final installment of the popular series, join
ÛÛÛ industry expert and award-winning author Deke McClelland
ÛÛÛ for an in-depth tour of the most powerful and empowering
ÛÛÛ features of Photoshop CS5. Discover the vast possibilities
ÛÛÛ of traditional tools, such as masking and blend modes, and
ÛÛÛ then delve into Smart Objects, Photomerge, as well as the
ÛÛÛ new Puppet Warp, Mixer Brush, and HDR features. Exercise
ÛÛÛ files accompany the course.
ÛÛÛ
ÛÛÛ
ÛÛÛ Install notes:
ÛÛÛ
ÛÛÛ 1.) Unrar
ÛÛÛ 2.) Burn/mount
ÛÛÛ 3.) Enjoy!
ÛÛÛ
²²²
±±±
°°°
ÜÜÜ Ü ß²²ÛÛÛÛÛÛÛÛÛÛÛÛÛÛÛÛÛÛÛÛÛÛÛÛÛÛÛÛÛÛÛÛÛÛÛÛÛÛÛÛÛÛÛÛÛ²ß
²²² Ü ßÜ ßß²Ü
ßßßß Û ²² Ü ß GREETINGS:
°±²ÛÛÛÛÛÛß Üß ß²ß
ÜÜÜ AOD, CLASS, CROSSFiRE, JiOO, SAC
ÛÛÛ EVILISO, 4KIDS, SHOCK, MAGE, DYNAMiCS
ÛÛÛ
ÛÛÛÜß Üß Big thanks to all JGT sites, and
ÛÛÛÝ ÛÛ ± sites accepting us!
²ÛÛ²Ü ßÜ ÜÜÜÜÜÜÜ
ß ßÛÛ²²ÜÜÜÜ ÛÛÛÛ²²
ßßßßÛÛÛÛ²²ÜÜÜÜÜ ÜÛÛÛÛÛÛ
ßßßßßÛÛÛÛÛ²²ÜÜÜÜÜ ÜÜÜܲÛÛÛÛ²ß
Û²² Ü ßßßßß²²ÛÛÛÛÛÛÛÛÛÛÛÛÛÛÛÛ²ßß
ÛÛÛ ßßß²²ÜÜÜ ßßßßßßßßßßßß
°±²ÛßÜßÜ ß²ÛÛÛÛÛÛÛ²ß ÜßÜßÜßÜß Ü ßßÛÛ²Ü ßÜÜ ßßßÜßÜßÜßÜßÜÛß²²²±±± ±±°° °
ÛÛÛ Ü²Ü ÛÛ²² ²² ß
ÛÛÛ in memory of ß ÜÛßß Üß drawn by the honored
ÛÛÛ THEPROF ß FX/SAC
ܲÛÛ
ßßÜ
"judgement day is near..."
資源來自網絡收集 未經過一一的質量 安全等檢測
只是把收集的資源和各位驢友分享 僅作網絡學習交流使用 請勿用於商業用途 !
希望各位下載的驢友能多多參與分流保源
- 上一頁:《Siemens Plm NX V7.5輔助學習系統》(SIEMENS PLM NX V7.5 CAST)WIN32/64[光盤鏡像]
- 下一頁:《Photoshop CS5:運動修飾項目教程》(Photoshop CS5: Athletic Retouching Projects)[光盤鏡像]
相關資源:


- [電腦基礎]《AE影視級後期視覺特效制作教程集VOL.4》(After Effects Video Tutorials DVD ae tutsplus Vol.4)[光盤鏡像]
- [電腦基礎]《使用Flash Professional CS5創作一個簡單的Android游戲視頻教程》(Lynda.com Flash Professional CS5 Creating A Simple Game For Android Devices)[光盤鏡像]
- [電腦基礎]《Microsoft Silverlight 5 基本應用視頻教程》(Lynda.com Silverlight 5 Essential Training)[光盤鏡像]
- [生活百科]《短信超級玩》掃描版[PDF] 資料下載
- [生活百科]《串珠英文教材兩本》(Beading Guide Books)[PDF] 資料下載
- [電腦基礎]《AE 表達式教程(Cartoon Smart)》(After Effects Expressions)[光盤鏡像]
- [其他資源綜合]《偽裝者》(The Pretender)全22集[RMVB]資料下載
- [生活百科]《月季》掃描版[PDF] 資料下載
- [其他資源綜合]《米娜·女性大世界》(更新至2013年11期)全彩高清版[PDF]
- [生活百科]《貝太廚房之親愛的便當》PDF 資料下載
- [其他資源綜合]《《ITjob軟件開發教程-從Win32到MFC 》 每天9點——17點觀看》(The ITjob software development tutorial-from Win32 to MFC &q
- [人文社科]《TED演講集:Jonathan Drori談每顆花粉都有一個故事》(Jonathan Drori: Every pollen grain has a story) 中文字幕[WMV]
- [其他圖書]《鄭壽全醫學三書》掃描版[PDF]
- [人文社科]《阿波羅13號》(Apollo 13)[RMVB]
- [計算機與網絡]ASP_NET網站開發典型模塊與實例精講
- [教育科技]《慢性腹瀉專輯—當代名醫臨證精華》(史宇廣&單書健)掃描版[PDF]
- [英語學習資料]《CNN互動英語2011》[光盤鏡像]
- [操作系統]《蘋果機操作系統9.2&字體》(mac 9.2)中文版[ISO],操作系統、資源下載
- [教育綜合]《oeasy教你玩轉網頁設計》-更新到十六 服務器》(oeasy web html)[MP4]
- [人文社科]《個人主義》(Individualism)((英)史蒂文·盧克斯)中譯本,掃描版[PDF]
- 《Photoshop設計基礎培訓視頻教程》(Lynda.com Up and Running with Photoshop for Design)[光盤鏡像]
- 《Zope資料合集》(Zope)
- 《北風網網友原創C#版本勇者斗惡龍游戲全套免費發布(2.0版本有聲游戲版本已經發布)》[壓縮包]
- 《Lynda.com Compressor 2.1 必備教程》(Lynda.com Compressor 2.1 Essential Training)CFE-教程[Bin]
- 《oracle 9i ocp chinaitlab版本》[RMVB]
- 《編輯多邊形建模系列教程(六)洗面池建模Part1(視頻)》(edit poly)[壓縮包]
- 《ALIAS.MOTIONBUILDER.V7.0》(ALIAS.MOTIONBUILDER.V7.0)
- 《Photoshop CS中文版教程與實訓》PDF
- 《北風網陶寶哥老師Ant使用全攻略全套下載》完整版[壓縮包]
- 《PC游戲編程 人機博弈》
- 《2009年北風網資深講師李炎恢老師ASP視頻教程》完結[壓縮包]
- 《Windows Vista Plain and Simple》[CHM]
免責聲明:本網站內容收集於互聯網,本站不承擔任何由於內容的合法性及健康性所引起的爭議和法律責任。如果侵犯了你的權益,請通知我們,我們會及時刪除相關內容,謝謝合作! 聯系信箱:[email protected]
Copyright © 電驢下載基地 All Rights Reserved