| 《Blender 3D 2.49不可思議的機器》(Blender 3D 2.49 Incredible Machines)英文文字版[PDF] | |
|---|---|
| 下載分級 | 图书资源 |
| 資源類別 | 教育科技 |
| 發布時間 | 2017/7/10 |
| 大 小 | - |
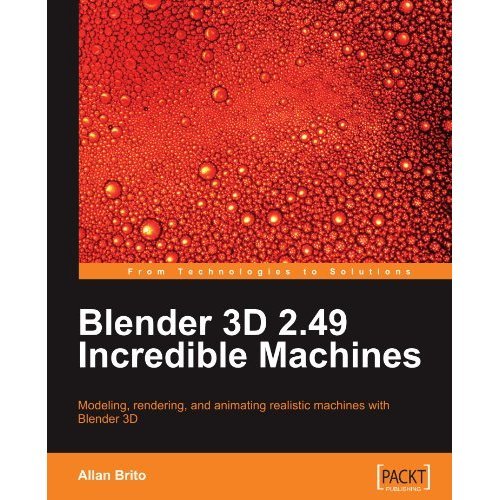
《Blender 3D 2.49不可思議的機器》(Blender 3D 2.49 Incredible Machines)英文文字版[PDF] 簡介: 中文名 : Blender 3D 2.49不可思議的機器 原名 : Blender 3D 2.49 Incredible Machines 作者 : Allan Brito 圖書分類 : 科技 資源格式 : PDF 版本 : 英文文字版 出版社 : Packt Publishing Ltd. 書號 : 978-1-847197-46-7 發行時間 : 2009年11月 地
電驢資源下載/磁力鏈接資源下載:
全選
"《Blender 3D 2.49不可思議的機器》(Blender 3D 2.49 Incredible Machines)英文文字版[PDF]"介紹
中文名: Blender 3D 2.49不可思議的機器
原名: Blender 3D 2.49 Incredible Machines
作者: Allan Brito
圖書分類: 科技
資源格式: PDF
版本: 英文文字版
出版社: Packt Publishing Ltd.
書號: 978-1-847197-46-7
發行時間: 2009年11月
地區: 美國
語言: 英文
簡介:

內容介紹:
Blender 3D是一款優秀的開源3D軟件。有著堪比當今重量級3D軟件的性能。
官方網站:www.blender.org
國內關於Blender的資料還不多,因此向大家介紹些國外的Blender書籍,希望能夠給大家提供方便。
《Blender 3D 2.49不可思議的機器》全面介紹了Blender的建模、渲染、動畫等各種功能,很適合學習使用。
作者介紹:
Allan Brito是位巴西藝術家,使用Blender進行藝術創作。在3D建模、動畫和多媒體方面有廣泛的使用和教育經驗。這是他的第三本關於Blender的圖書。
摘錄書中序言:
序言
Blender 3D提供了創作用於藝術、電影和計算機游戲的逼真3D模型的全部功能。《Blender 3D 2.49不可思議的機器》將指導你一步一步地創建武器、載具、機器人等等。
這本書將展示如何使用Blender 3D建模和生成視覺效果。通過本書,將指導你一步步地創建三個不同的項目:一個科幻風格的武器、一艘太空船和一個巨大的機器人。盡管這些可能不夠真實,但從這些實例中學到的技巧將使你有能力創造你自己的奇思妙想。
這本書的三個部分,其知識點的安排是循序漸進的。第一個項目是一把手持式武器,我們將建一個粗糙的小模型。本書的這個部分將告訴你如何用Blender 3D創建模型細節。
在第二個項目中,我們將創建一艘太空船,再裝點上一些小玩意,新的材質和貼圖。在這一部分裡,我們將接觸到金屬、玻璃和一些組成太空船的細節。
最後,一個大型復雜的項目,一個可變形機器人。本書的最後一部分將包括建立兩個模型和如何讓它們相互變形。這個項目的對象數量和復雜度都很大,但是和前面的部分一樣,我們將一步步的指導你完成這個項目。
注:以上是我翻譯的,本書為英文版,國內未見譯本。
我本有心翻譯,但現在太忙,沒有時間。
以後我會陸續為大家介紹些優秀的Blender方面的資料,歡迎大家使用Blender,支持自由軟件!
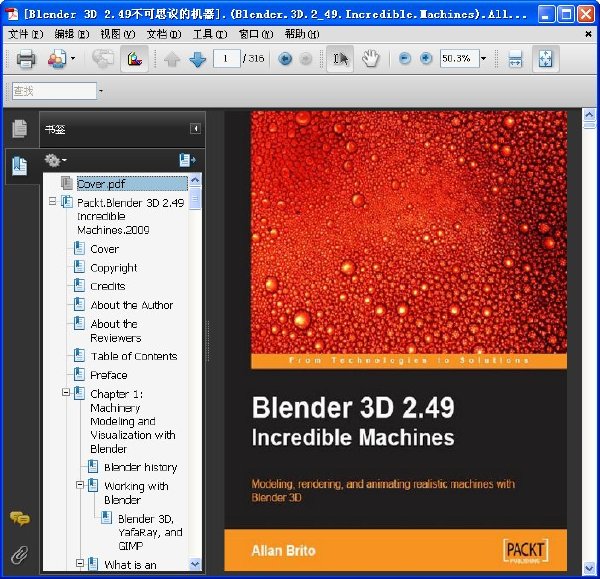
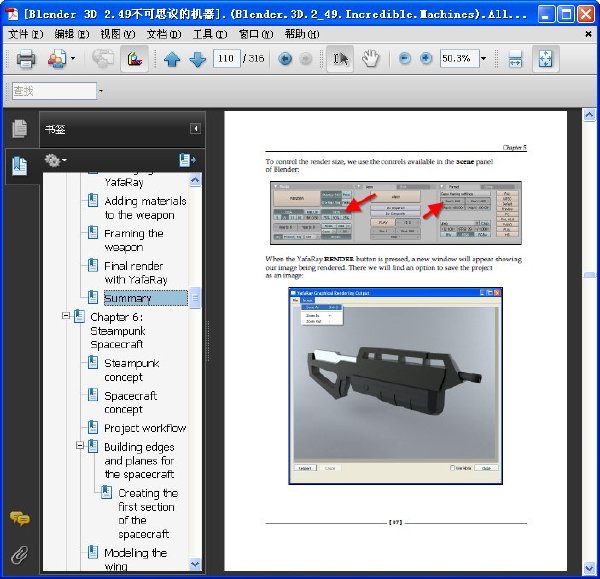
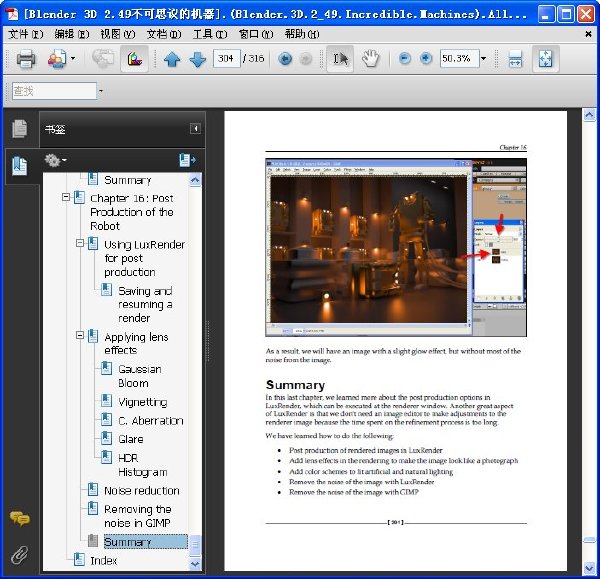
內容截圖:


目錄:
Chapter 1: Machinery Modeling and Visualization with Blender
1.1 Blender history
1.2 Working with Blender
1.2.1 Blender 3D, YafaRay, and GIMP
1.3 What is an Incredible Machine?
1.3.1 How the book is organized
1.3.2 Do I have to know Blender already?
1.3.3 How to know more about Blender 3D
1.4 Summary
Chapter 2: Modeling a Handgun
2.1 Briefing and concept
2.1.1 Objectives
2.1.2 Why a hand weapon?
2.1.3 Parts of the model
2.2 Modeling workflow
2.3 Best modeling technique for this project
2.4 Effects and rendering
2.5 Summary
Chapter 3: Polygon Modeling of the Weapon
3.1 Starting with a background image
3.2 Using subdivision to model
3.2.1 Modeling the hand wrap
3.2.2 Modeling the small and removable parts
3.2.2.1 Using hooks to place and align objects
3.3 Summary
Chapter 4: Adding Details
4.1 Tools and techniques for detailing
4.2 Face normals
4.2.1 Adding the handgrip
4.2.2 Using the spin tool to close a model
4.2.3 Adding creases and rounded details
4.3 Summary
Chapter 5: Rendering the Project with YafaRay
5.1 YafaRay renderer
5.1.1 Installing YafaRay
5.2 Creating a studio environment
5.3 Adding light to the scene
5.4 How YafaRay works
5.5 Setting lights in YafaRay
5.6 Adding materials to the weapon
5.7 Framing the weapon
5.8 Final render with YafaRay
5.9 Summary
Chapter 6: Steampunk Spacecraft
6.1 Steampunk concept
6.2 Spacecraft concept
6.3 Project workflow
6.4 Building edges and planes for the spacecraft
6.4.1 Creating the first section of the spacecraft
6.5 Modeling the wing
6.6 Modeling the front
6.7 Summary
Chapter 7: Working with Smaller Areas
7.1 Modeling the front of the spacecraft
7.2 Adding details to the wing
7.2.1 Modeling the engines
7.3 Creating the bottom of the spacecraft
7.4 Creating the weapons
7.5 Mirroring the spacecraft
7.6 Closing the cockpit
7.7 Detailing the fuselage
7.7.1 Modeling auxiliary engines
7.8 Adding cables and wires
7.8.1 Using curves
7.8.1.1 Twisting the cables
7.8.2 Adding the cables to the model
7.9 Summary
Chapter 8: Advanced UV Mapping
8.1 UV mapping in Blender
8.1.1 What is UV mapping?
8.1.2 Using UV mapping in Blender
8.2 Using smart projections
8.3 UV test grid
8.4 Using the unwrap tool
8.4.1 Planning the unwrap
8.5 Controlling and editing the UV layout
8.5.1 Pinning and unpinning vertices
8.5.2 Live Unwrap Transform
8.6 Editing the UV
8.7 Exporting the layout
8.8 Editing the texture
8.9 Summary
Chapter 9: Putting the Spacecraft to Fly and Shoot with Special Effects
9.1 Blender particles
9.2 How particles work
9.2.1 Creating particles
9.2.1.1 Adding speed and force fields
9.3 The rear engine
9.4 The guns
9.5 Summary
Chapter 10: Rendering the Spacecraft with YafaRay
10.1 Environment setup in YafaRay—creating a physical sky
10.1.1 Single Color
10.1.2 Gradient
10.1.3 Texture
10.1.4 SunSky
10.1.5 DarkTide's SunSky
10.2 Materials and textures in YafaRay
10.2.1 Setting up a metal material
10.2.2 Creating the glass in the cockpit
10.3 Rendering the scene
10.3.1 Rendering a night view of the spacecraft
10.4 Summary
Chapter 11: Transforming Robot
11.1 What is a transforming robot?
11.1.1 How big will the robot be?
11.1.2 Textures and materials
11.2 Rendering with LuxRender
11.3 Mixing modeling and animation
11.4 Modeling the object with poly modeling
11.5 Choosing a modeling technique
11.6 Modeling the legs
11.7 Modeling the main body
11.8 Modeling the head
11.9 Modeling the arms
11.10 Summary
Chapter 12: Using Modifiers and Curves to Create Details for the Robot and Scene
12.1 Modifiers
12.1.1 Using the bevel modifier to chamfer the edges of the model
12.1.2 Using the array modifier to add rivets
12.1.2.1 Creating wires and cables with curves and hooks
12.2 Adding details to the robot
12.3 Modeling the scenario
12.4 Modeling the stands for the robots
12.5 Creating the storage boxes
12.6 Modeling lights
12.7 Summary
Chapter 13: Making the Robot Look Metallic with Materials in LuxRender
13.1 Installing LuxRender
13.1.1 Using LuxBlend
13.2 Setting up materials for the robot
13.2.1 Adding textures to the ground of the scene
13.3 Summary
Chapter 14: Adding Lights to the Scene and Rendering with LuxRender
14.1 Unbiased render engine—how it works
14.2 How to add light sources in LuxRender
14.2.1 Using objects as light sources
14.2.2 Light groups
14.2.3 Environment for rendering
14.3 Rendering the scene
14.4 Summary
Chapter 15: It's Alive! Animating the Robot
15.1 Animation controls and hierarchies
15.1.1 Removing the hierarchy
15.2 Joints and pivots
15.2.1 Using empties as helper objects
15.2.2 Pivots without empties
15.3 Posing the robot
15.3.1 Using two robots for posing
15.4 Basic animation with the robot
15.4.1 Adding keyframes and movement
15.4.2 Animating objects
15.4.3 Erasing keyframes
15.5 Distributing the robots
15.6 Rendering and animating the lights
15.7 Summary
Chapter 16: Post Production of the Robot
16.1 Using LuxRender for post production
16.1.1 Saving and resuming a render
16.2 Applying lens effects
16.2.1 Gaussian Bloom
16.2.2 Vignetting
16.2.3 C. Aberration
16.2.4 Glare
16.2.5 HDR Histogram
16.3 Noise reduction
16.4 Removing the noise in GIMP
16.5 Summary
原名: Blender 3D 2.49 Incredible Machines
作者: Allan Brito
圖書分類: 科技
資源格式: PDF
版本: 英文文字版
出版社: Packt Publishing Ltd.
書號: 978-1-847197-46-7
發行時間: 2009年11月
地區: 美國
語言: 英文
簡介:

內容介紹:
Blender 3D是一款優秀的開源3D軟件。有著堪比當今重量級3D軟件的性能。
官方網站:www.blender.org
國內關於Blender的資料還不多,因此向大家介紹些國外的Blender書籍,希望能夠給大家提供方便。
《Blender 3D 2.49不可思議的機器》全面介紹了Blender的建模、渲染、動畫等各種功能,很適合學習使用。
作者介紹:
Allan Brito是位巴西藝術家,使用Blender進行藝術創作。在3D建模、動畫和多媒體方面有廣泛的使用和教育經驗。這是他的第三本關於Blender的圖書。
摘錄書中序言:
序言
Blender 3D提供了創作用於藝術、電影和計算機游戲的逼真3D模型的全部功能。《Blender 3D 2.49不可思議的機器》將指導你一步一步地創建武器、載具、機器人等等。
這本書將展示如何使用Blender 3D建模和生成視覺效果。通過本書,將指導你一步步地創建三個不同的項目:一個科幻風格的武器、一艘太空船和一個巨大的機器人。盡管這些可能不夠真實,但從這些實例中學到的技巧將使你有能力創造你自己的奇思妙想。
這本書的三個部分,其知識點的安排是循序漸進的。第一個項目是一把手持式武器,我們將建一個粗糙的小模型。本書的這個部分將告訴你如何用Blender 3D創建模型細節。
在第二個項目中,我們將創建一艘太空船,再裝點上一些小玩意,新的材質和貼圖。在這一部分裡,我們將接觸到金屬、玻璃和一些組成太空船的細節。
最後,一個大型復雜的項目,一個可變形機器人。本書的最後一部分將包括建立兩個模型和如何讓它們相互變形。這個項目的對象數量和復雜度都很大,但是和前面的部分一樣,我們將一步步的指導你完成這個項目。
注:以上是我翻譯的,本書為英文版,國內未見譯本。
我本有心翻譯,但現在太忙,沒有時間。
以後我會陸續為大家介紹些優秀的Blender方面的資料,歡迎大家使用Blender,支持自由軟件!
內容截圖:


目錄:
Chapter 1: Machinery Modeling and Visualization with Blender
1.1 Blender history
1.2 Working with Blender
1.2.1 Blender 3D, YafaRay, and GIMP
1.3 What is an Incredible Machine?
1.3.1 How the book is organized
1.3.2 Do I have to know Blender already?
1.3.3 How to know more about Blender 3D
1.4 Summary
Chapter 2: Modeling a Handgun
2.1 Briefing and concept
2.1.1 Objectives
2.1.2 Why a hand weapon?
2.1.3 Parts of the model
2.2 Modeling workflow
2.3 Best modeling technique for this project
2.4 Effects and rendering
2.5 Summary
Chapter 3: Polygon Modeling of the Weapon
3.1 Starting with a background image
3.2 Using subdivision to model
3.2.1 Modeling the hand wrap
3.2.2 Modeling the small and removable parts
3.2.2.1 Using hooks to place and align objects
3.3 Summary
Chapter 4: Adding Details
4.1 Tools and techniques for detailing
4.2 Face normals
4.2.1 Adding the handgrip
4.2.2 Using the spin tool to close a model
4.2.3 Adding creases and rounded details
4.3 Summary
Chapter 5: Rendering the Project with YafaRay
5.1 YafaRay renderer
5.1.1 Installing YafaRay
5.2 Creating a studio environment
5.3 Adding light to the scene
5.4 How YafaRay works
5.5 Setting lights in YafaRay
5.6 Adding materials to the weapon
5.7 Framing the weapon
5.8 Final render with YafaRay
5.9 Summary
Chapter 6: Steampunk Spacecraft
6.1 Steampunk concept
6.2 Spacecraft concept
6.3 Project workflow
6.4 Building edges and planes for the spacecraft
6.4.1 Creating the first section of the spacecraft
6.5 Modeling the wing
6.6 Modeling the front
6.7 Summary
Chapter 7: Working with Smaller Areas
7.1 Modeling the front of the spacecraft
7.2 Adding details to the wing
7.2.1 Modeling the engines
7.3 Creating the bottom of the spacecraft
7.4 Creating the weapons
7.5 Mirroring the spacecraft
7.6 Closing the cockpit
7.7 Detailing the fuselage
7.7.1 Modeling auxiliary engines
7.8 Adding cables and wires
7.8.1 Using curves
7.8.1.1 Twisting the cables
7.8.2 Adding the cables to the model
7.9 Summary
Chapter 8: Advanced UV Mapping
8.1 UV mapping in Blender
8.1.1 What is UV mapping?
8.1.2 Using UV mapping in Blender
8.2 Using smart projections
8.3 UV test grid
8.4 Using the unwrap tool
8.4.1 Planning the unwrap
8.5 Controlling and editing the UV layout
8.5.1 Pinning and unpinning vertices
8.5.2 Live Unwrap Transform
8.6 Editing the UV
8.7 Exporting the layout
8.8 Editing the texture
8.9 Summary
Chapter 9: Putting the Spacecraft to Fly and Shoot with Special Effects
9.1 Blender particles
9.2 How particles work
9.2.1 Creating particles
9.2.1.1 Adding speed and force fields
9.3 The rear engine
9.4 The guns
9.5 Summary
Chapter 10: Rendering the Spacecraft with YafaRay
10.1 Environment setup in YafaRay—creating a physical sky
10.1.1 Single Color
10.1.2 Gradient
10.1.3 Texture
10.1.4 SunSky
10.1.5 DarkTide's SunSky
10.2 Materials and textures in YafaRay
10.2.1 Setting up a metal material
10.2.2 Creating the glass in the cockpit
10.3 Rendering the scene
10.3.1 Rendering a night view of the spacecraft
10.4 Summary
Chapter 11: Transforming Robot
11.1 What is a transforming robot?
11.1.1 How big will the robot be?
11.1.2 Textures and materials
11.2 Rendering with LuxRender
11.3 Mixing modeling and animation
11.4 Modeling the object with poly modeling
11.5 Choosing a modeling technique
11.6 Modeling the legs
11.7 Modeling the main body
11.8 Modeling the head
11.9 Modeling the arms
11.10 Summary
Chapter 12: Using Modifiers and Curves to Create Details for the Robot and Scene
12.1 Modifiers
12.1.1 Using the bevel modifier to chamfer the edges of the model
12.1.2 Using the array modifier to add rivets
12.1.2.1 Creating wires and cables with curves and hooks
12.2 Adding details to the robot
12.3 Modeling the scenario
12.4 Modeling the stands for the robots
12.5 Creating the storage boxes
12.6 Modeling lights
12.7 Summary
Chapter 13: Making the Robot Look Metallic with Materials in LuxRender
13.1 Installing LuxRender
13.1.1 Using LuxBlend
13.2 Setting up materials for the robot
13.2.1 Adding textures to the ground of the scene
13.3 Summary
Chapter 14: Adding Lights to the Scene and Rendering with LuxRender
14.1 Unbiased render engine—how it works
14.2 How to add light sources in LuxRender
14.2.1 Using objects as light sources
14.2.2 Light groups
14.2.3 Environment for rendering
14.3 Rendering the scene
14.4 Summary
Chapter 15: It's Alive! Animating the Robot
15.1 Animation controls and hierarchies
15.1.1 Removing the hierarchy
15.2 Joints and pivots
15.2.1 Using empties as helper objects
15.2.2 Pivots without empties
15.3 Posing the robot
15.3.1 Using two robots for posing
15.4 Basic animation with the robot
15.4.1 Adding keyframes and movement
15.4.2 Animating objects
15.4.3 Erasing keyframes
15.5 Distributing the robots
15.6 Rendering and animating the lights
15.7 Summary
Chapter 16: Post Production of the Robot
16.1 Using LuxRender for post production
16.1.1 Saving and resuming a render
16.2 Applying lens effects
16.2.1 Gaussian Bloom
16.2.2 Vignetting
16.2.3 C. Aberration
16.2.4 Glare
16.2.5 HDR Histogram
16.3 Noise reduction
16.4 Removing the noise in GIMP
16.5 Summary
- 上一頁:《新編劍橋商務英語(初級)學生用書+同步輔導+教師用書(第三版)》((英)庫可 & (英)佩德雷蒂 & (英)斯蒂芬森)掃描版[PDF]
- 下一頁:《話題的結構與功能》(徐烈烔&劉丹青)掃描版[PDF]
相關資源:
 《專業數據庫軟件服務器版》(FileMaker Server Advanced)更新v11.0.3.312 專業版+v11.0.3.309 服務器版/Windows+MAC OSX/含注冊機[光盤鏡像]
- [生活圖書]《中醫養生秘方》(侯又白)掃描版[PDF]
- [其他圖書]《大镖師:解危奇拳》掃描版[PDF]
- [其他圖書]互聯網背後驅動:互聯網之達芬奇密碼
- [計算機與網絡]《軟件隨想錄:程序員部落酋長Joel談軟件》掃描版[PDF]
- [經濟管理]《你想到的都是錯的:本質Ⅳ:你的想法要符合行業本質》(郎鹹平 等著)掃描版[PDF]
- [生活圖書]《中國式飯局宴會細節全知道》掃描版[PDF]
- [人文社科]《美國內戰》(The American Civil War An Anthology of Ess
- [文學圖書]《謀殺的魅影:世界推理小說簡史》掃描版[PDF
- [其他圖書]《差點忘記了》彩圖版[PDF]
- [文學圖書]《影視文化前沿:轉型期大眾審美文化透視(上下冊)》(胡智鋒)掃描版[PDF]
- [光盤游戲]《迦太基戰爭》(Punic Wars)[Bin]
- [英語學習資料]Damien Rice -《零.0》[MP3!] 免費下載
- [多媒體類]《音頻傳送》(Rogue Amoeba Airfoil)v2.8.2[壓縮包]
- [學習課件]《居裡夫人傳》((法)艾芙·居裡)文字版[PDF] 資料下載
- [行業軟件]《人員緊急疏散模擬軟件》(Thunderhead Engineering Pathfinder)v2011.1.1409 X86|X64<持續更新>[壓縮包]
- [英語學習資料]《大學英語自學教程:詞匯、例句、mp3》部分帶朗文詞典例句[MP3!]
- [其他圖書]《明日汽車》(Move)創刊號(不斷更新……)
- [人文社科]《迪拜:沙漠奇跡》(世界名城叢書)掃描版[PDF]
- [應用軟件]《全國鐵路旅客列車電子時刻表》2005/09
- [其他資源綜合]《蝴蝶刀使用手冊》文字版[PDF] 資料下載
免責聲明:本網站內容收集於互聯網,本站不承擔任何由於內容的合法性及健康性所引起的爭議和法律責任。如果侵犯了你的權益,請通知我們,我們會及時刪除相關內容,謝謝合作! 聯系信箱:[email protected]
Copyright © 電驢下載基地 All Rights Reserved


